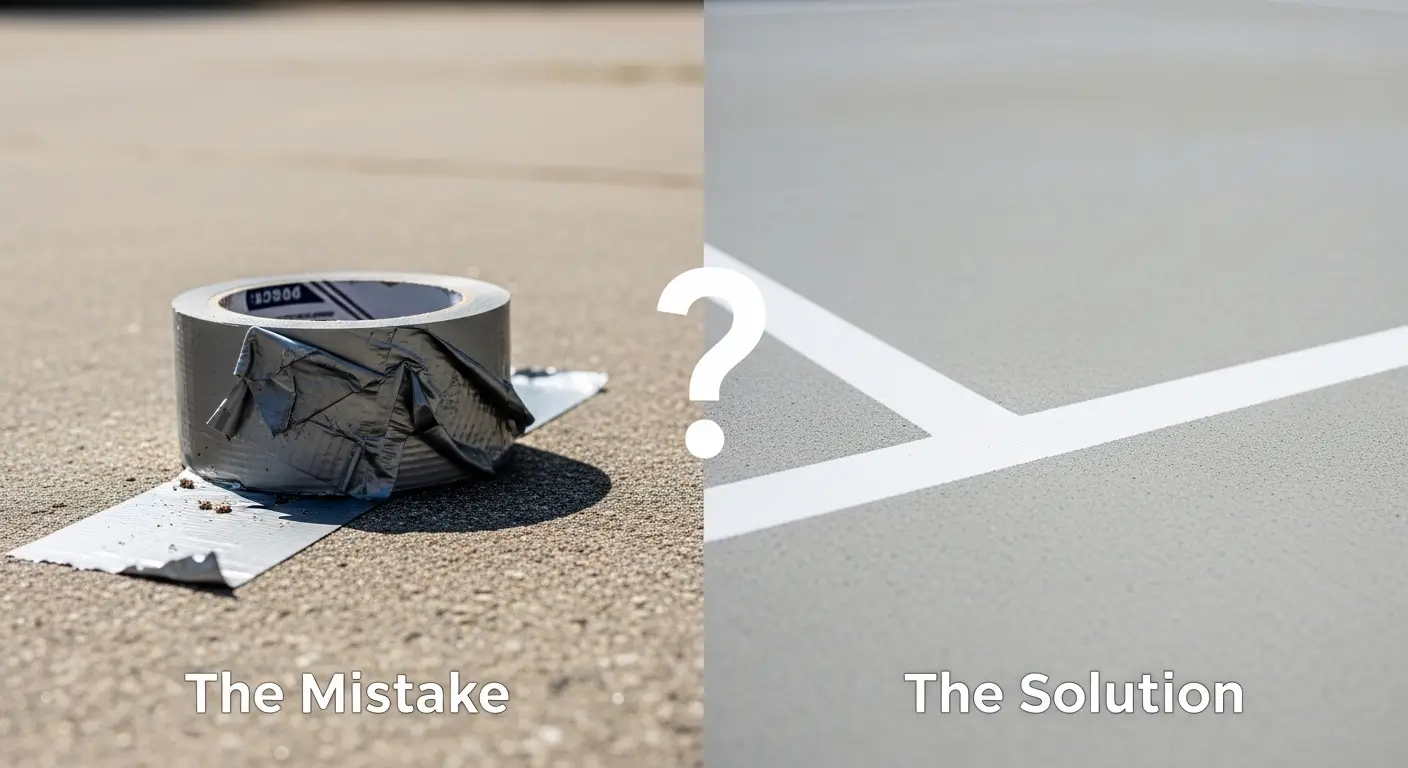
If you are looking to turn your driveway into a temporary pickleball sanctuary, the “quick fix” of a roll of silver duct tape is incredibly tempting. It’s cheap, highly visible, and takes minutes to apply. However, this is one of the most common mistakes that new players make when setting up a home court.
What starts as a ten-dollar solution often results in hundreds of dollars of damage to your pavement. Before you lay down a single inch of adhesive, let’s look at why duct tape fails and how to paint lines on a pickleball court the right way.
The Adhesive Nightmare: Why Tape Destroys Your Surface
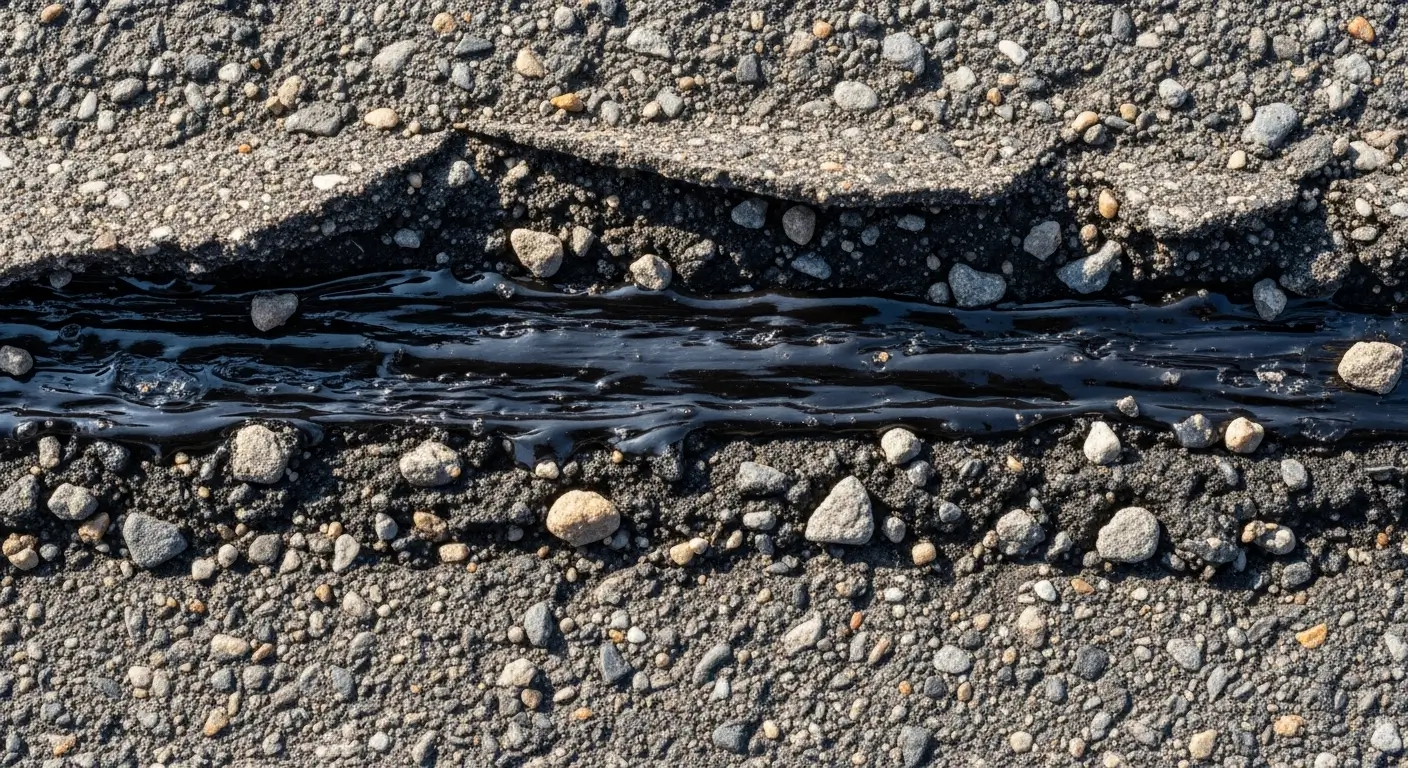
The primary problem with duct tape is the adhesive backing. On a porous surface like concrete or asphalt, that “grip” becomes a permanent mess. When outdoor temperatures rise, the adhesive softens and seeps into the pores of your driveway.
When you eventually try to peel the tape up, it leaves a thick, grey, sticky residue that acts as a magnet for dirt. On older asphalt, it can even pull up chunks of the surface itself. If you’ve already invested in the best backyard court surface for knees, using duct tape is the fastest way to ruin your investment.
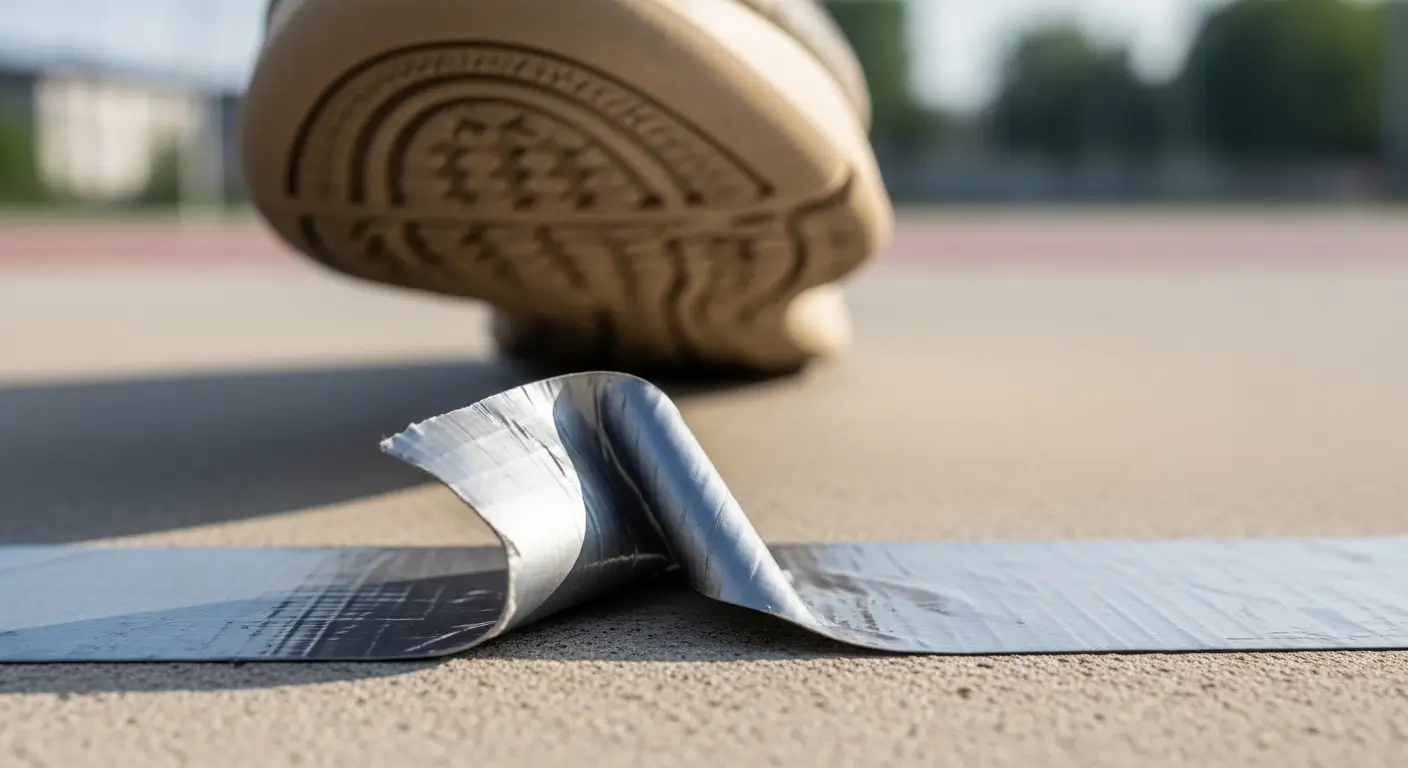
The Safety Trap: Why Taped Lines Lead to Injuries
As we discussed in our guide on basketball shoes for pickleball, footwork relies on consistent friction. Duct tape is notoriously slippery, especially when wet or dusty. Furthermore, as the sun beats down, the edges of the tape begin to curl. These “lips” are perfect for catching the toe of a court shoe, leading to tripped falls at the kitchen line.
How to Paint Lines on a Pickleball Court Like a Professional
If you want a court that looks professional and stays safe, you need to transition from tape to painting lines for a pickleball court. The process is more involved, but the results are significantly better for gameplay.
Coach’s Corner: From the Court
“In my experience, the difference between a pro-grade court and a DIY disaster is the tension of the layout tape before you paint.
My Tip: Never pull your measuring tape or guide strings too tight, as they can ‘bow’ or snap back, resulting in wavy lines that ruin the court’s professional look and playability. Ensuring your layout is perfectly square is the most critical step before you commit to permanent paint—always verify your official pickleball driveway dimensions and safety buffers before the first drop of acrylic hits the ground.”
Step 1: Surface Preparation
You cannot apply pickleball court lines paint to a dirty surface. Use a leaf blower and a stiff broom to remove all debris. According to USA Pickleball Surface Guidelines, the surface must be completely dry and free of oil for the paint to bond correctly.
Step 2: Mapping the Dimensions
Use a chalk line to snap your boundaries. Remember, the total court size is $20′ \times 44’$. For accuracy, many DIYers borrow techniques from basketball court line painting, using professional-grade stencil kits to ensure every corner is a perfect $90^\circ$.
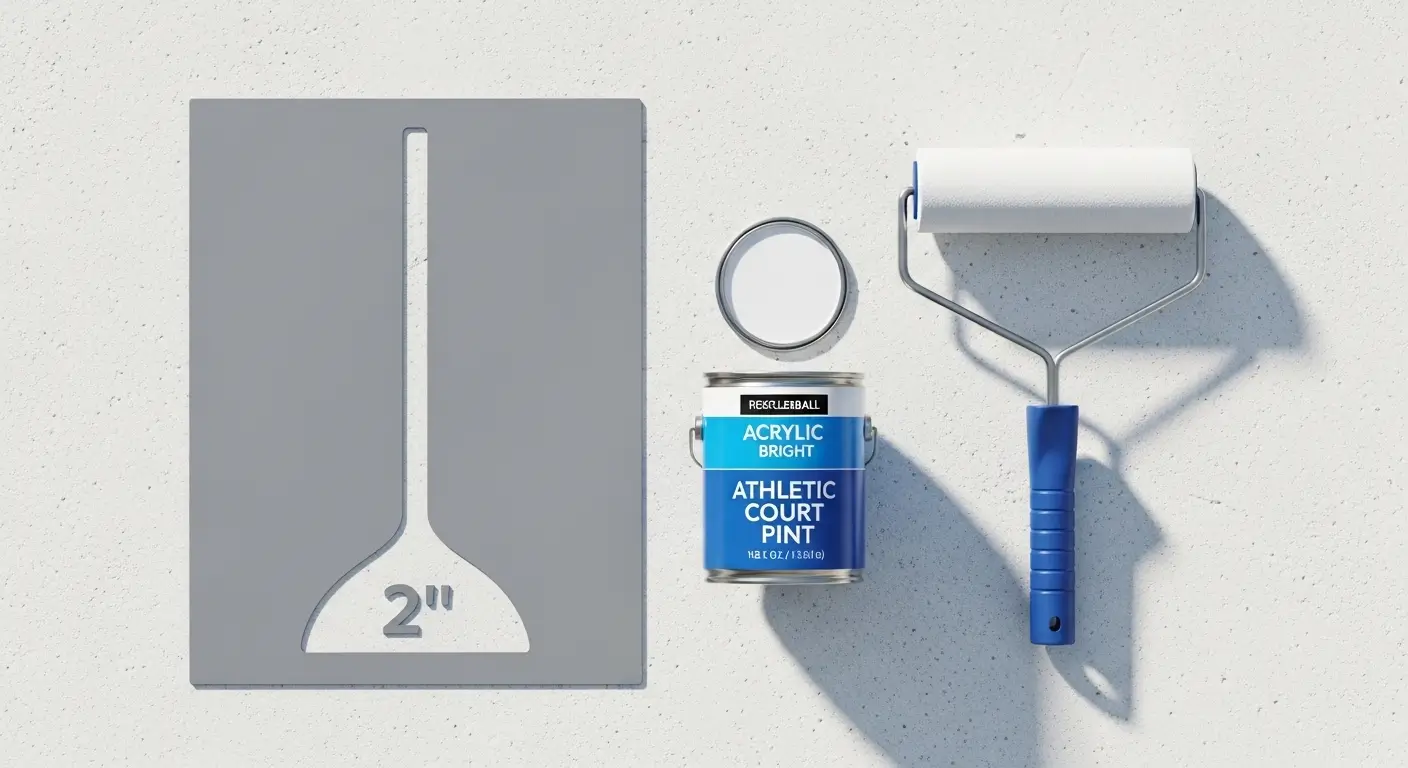
Choosing the Best Paint for Pickleball Court Lines
The best paint for pickleball court lines is a 100% acrylic, textured athletic paint. Standard spray paint or house paint becomes a “skating rink” when wet.
Athletic-grade pickleball court lines paint contains fine silica sand, providing the necessary grit so players don’t slip when stepping on the line during a dink rally. Brands like SportMaster or Laykold are the industry standards for 2026.
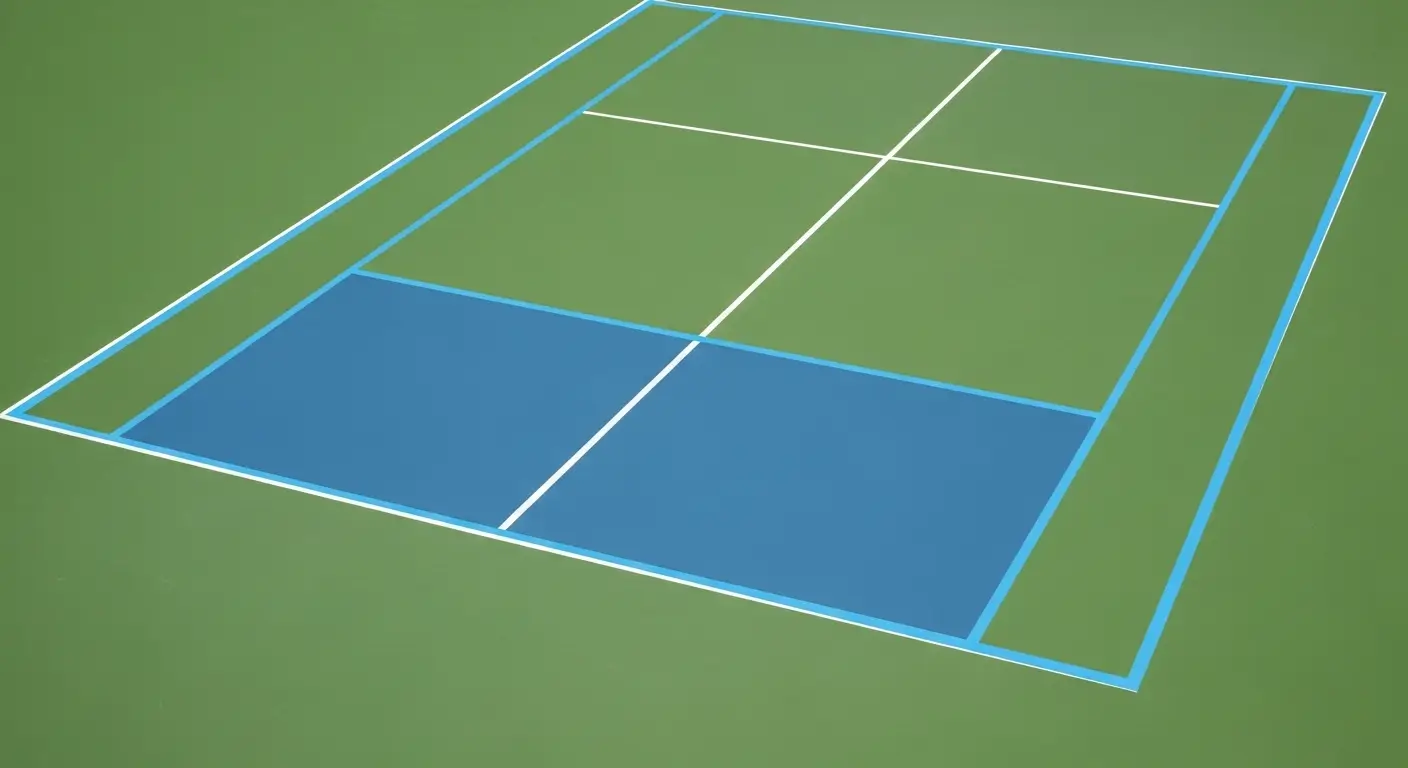
Painting Pickleball Lines on a Tennis Court
Many local communities are now painting pickleball lines on a tennis court to create “multi-sport” spaces. If you are doing this, color choice is critical.
To avoid confusion, use a high-contrast color that differs from the existing tennis lines. For example, if the tennis lines are white, use light blue or “pickleball green” for the new lines. This ensures players can easily distinguish the $20′ \times 44’$ boundary from the larger tennis court area.
The Bottom Line: Cost to Paint Pickleball Court Lines
When calculating the cost to paint pickleball court lines, consider these three tiers:
| Method | Estimated Cost (2026) | Durability |
| DIY Paint Kit | $75 – $150 | 2–4 Years |
| Professional Striping | $400 – $800 | 5+ Years |
| Duct Tape “Fix” | $10 (+$500 damage) | 2 Weeks |
Community Q&A: What’s Your DIY Experience?
We want to hear from you! Have you tried a specific brand of paint that held up through the winter? Or did you learn the “duct tape lesson” the hard way?
Drop a comment below with your questions or tips! Our community of court builders is here to help you get those lines straight and safe.
FAQ: Frequently Asked Questions
How long does it take for pickleball court line paint to dry?
Most acrylic-based paints are “dry to the touch” in 1 to 2 hours, but you should wait at least 24 hours before playing an intense game to ensure the bond is fully cured.
Can I use blue painter’s tape instead of duct tape?
Yes, but only for very temporary play (less than 24 hours). Blue painter’s tape (like FrogTape) has a lower tack and won’t leave residue, but it will still be a slipping hazard if it gets wet.
Is it legal to paint pickleball lines on a public tennis court?
Never paint on a public court without written permission from your local Parks and Rec department. Doing so can be considered vandalism. Instead, suggest “Shadow Lines” to your city council to accommodate both sports!
What is the most durable color for outdoor lines?
While white is traditional, bright yellow or light blue often holds its visibility longer against UV rays and provides better contrast on dark green or blue courts.